There’s something incredibly special about making a dessert from scratch for someone you care about. For me, Valentine’s Day isn’t about fancy dinners out; it’s about creating something sweet and memorable right in my own kitchen. These Red Velvet Cheesecake Cupcakes are the embodiment of that feeling. They are more than just a treat; they’re little bites of affection, a perfect blend of tangy cheesecake and rich, velvety cake, all dressed up for the most romantic day of the year. This is the Valentine’s Day Red Velvet Cheesecake recipe I come back to year after year.
I remember the first time I made these. I was nervous about getting the two distinct layers right, but the process was surprisingly straightforward. The result was these stunning, single-serving mini red velvet cheesecakes that looked like they came from a high-end bakery. They are the perfect way to say “I love you” without saying a word.
What You’ll Need for These Little Bites of Heaven
The magic of this recipe lies in its two distinct, yet harmonious, layers. We’re essentially making a small-batch red velvet cake for the crust and a classic cheesecake batter for the top. Don’t be intimidated; the ingredients are simple pantry staples.
For the Red Velvet Crust:
- Dry Ingredients: You’ll need ¾ cup of all-purpose flour, 1 ½ tablespoons of unsweetened cocoa powder (this gives red velvet its subtle chocolate note), ½ teaspoon of baking soda for lift, and ¼ teaspoon of salt to balance the sweetness.
- Wet Ingredients: 5 tablespoons of unsalted butter, softened to room temperature, is crucial for a smooth batter. We’ll cream this with ½ cup of granulated sugar. You’ll also need one egg yolk for richness, a tablespoon of milk, a teaspoon of vanilla extract for warmth, and of course, red food coloring for that iconic, vibrant hue.
For the Cheesecake Topping:
- The Creamy Base: The star here is 12 ounces of full-fat cream cheese, properly softened. Seriously, let it sit on the counter for an hour or two. This is the secret to a lump-free cheesecake. Two tablespoons of sour cream add a delightful tang and moisture.
- The Rest: 5 tablespoons of sugar for sweetness, one egg white to bind it all together without making it too heavy, and another 1 ½ teaspoons of vanilla extract.
- For Serving: A simple whipped cream (about 1 ½ to 2 cups) and some festive heart-shaped sprinkles are the perfect finishing touch for these Valentines mini cheesecakes.
Bringing Your Red Velvet Cheesecake Cupcakes to Life
This is where we build our beautiful layers. Take your time, enjoy the process, and get ready for a delicious reward. Start by preheating your oven to 350°F and lining a standard cupcake pan with paper liners.
Step 1: Create the Red Velvet Base
- In a medium bowl, whisk together your dry ingredients: the flour, cocoa powder, baking soda, and salt. Set this aside for a moment.
- In a separate, larger bowl, use a hand mixer or stand mixer to beat the softened butter and sugar together until the mixture is light and fluffy. Scrape down the sides of the bowl, then beat in the egg yolk, milk, and vanilla extract. Add a few drops of red food coloring until you achieve your desired shade of red.
- Gently mix the dry ingredients into the wet ingredients on low speed until just combined. The batter will be quite thick and sticky, almost like a soft cookie dough.
- Spoon about one tablespoon of the red velvet mixture into the bottom of each cupcake liner, pressing it down into an even layer.
- Pop the pan into the oven to pre-bake the crust for 6-7 minutes. The crusts will puff up and then sink in the middle as they cool slightly—this is perfectly normal! It creates a little nest for the cheesecake filling.
Step 2: Whip Up the Cheesecake Filling
- While the crusts are baking, you can make the cheesecake layer. In a clean bowl, beat the softened cream cheese on medium-high speed until it’s completely smooth.
- Add the sour cream and sugar, mixing until they are just combined. Add the egg white and vanilla, and mix on medium speed only until the batter is smooth. Do not overbeat the mixture once the egg is in; this incorporates too much air and is the number one cause of cracked cheesecakes.
- Spoon 2-3 tablespoons of the cheesecake mixture on top of each pre-baked red velvet crust, spreading it gently to the edges.
- Bake for another 18-20 minutes. To check for doneness, gently shake the pan. The edges should be set, but the center should still have a slight jiggle. To prevent the tops from browning, you can loosely tent the pan with aluminum foil during the last 5-10 minutes of baking.
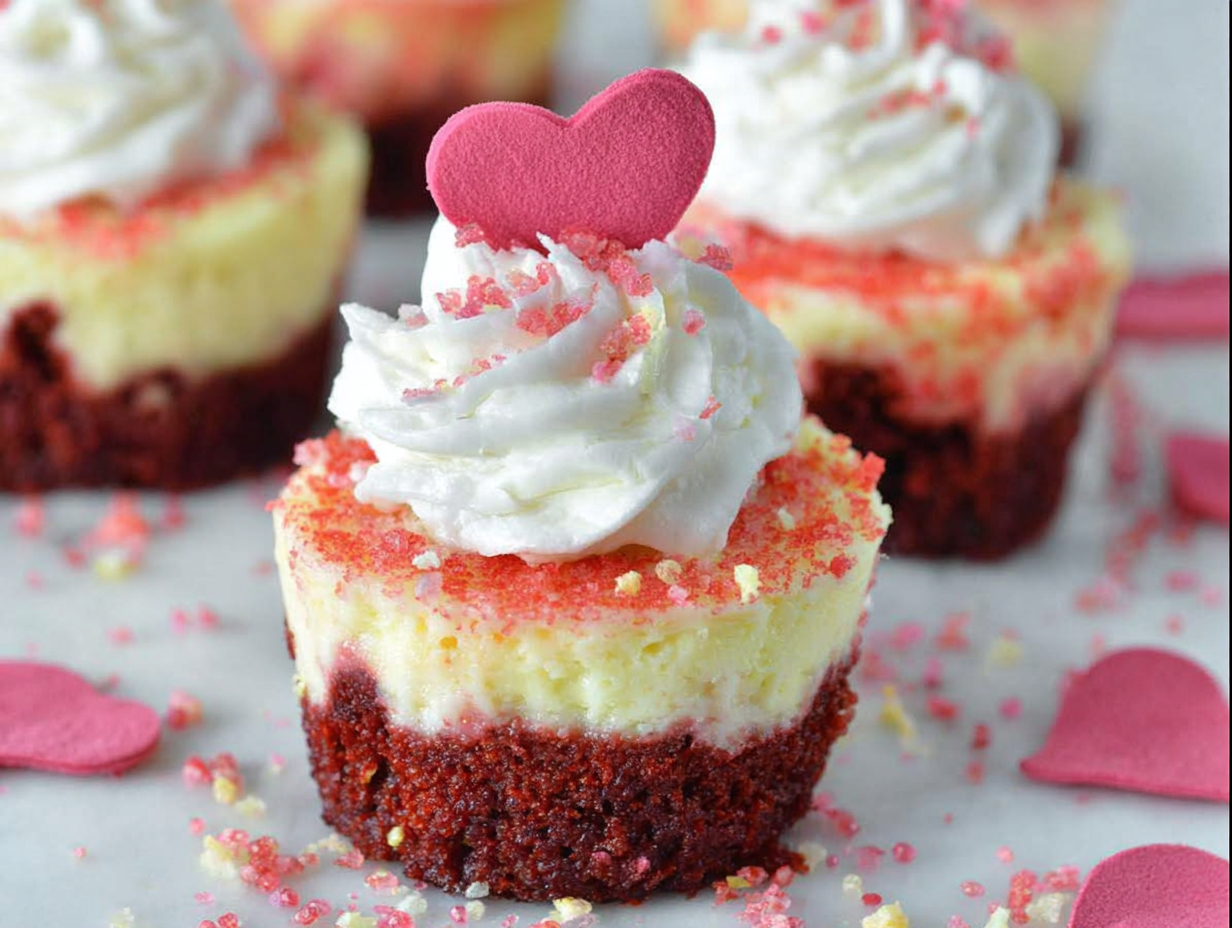
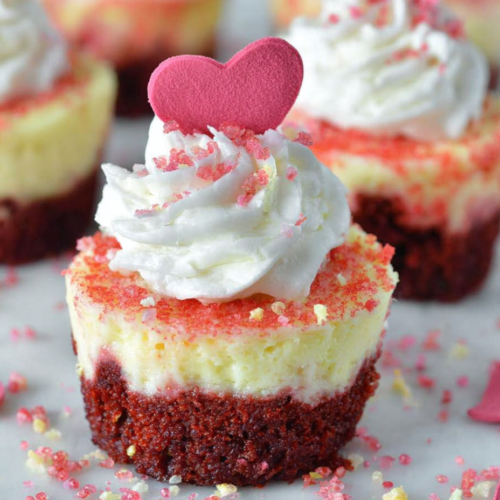
- Let the cupcakes cool at room temperature for about 30 minutes before transferring them to the refrigerator to set completely, which takes 1-2 hours. Before serving your beautiful red velvet cheesecake cupcake, top it with a generous dollop of whipped cream and a smattering of sprinkles.
A Chef’s Secret: The Red Velvet Oreo Twist
If you want to introduce another layer of flavor and texture, here’s a fun variation that creates incredible Red Velvet Oreo Cheesecake Cupcakes. For the crust, finely crush about 6-8 Oreo cookies (filling and all). Reduce the all-purpose flour in the red velvet recipe to ½ cup and fold the crushed Oreos into the batter along with the other dry ingredients. The little bits of dark chocolate cookie and cream filling add a delightful crunch and complement the cocoa notes in the red velvet perfectly. It’s an easy way to experiment with mini cheesecakes different flavors.
Storing Your Sweet Creations
Because of the cream cheese topping, these cupcakes must be stored in the refrigerator. Place them in an airtight container, where they will keep beautifully for up to 4 days. I recommend waiting to add the whipped cream and sprinkles until just before you plan to serve them to keep everything looking fresh and picture-perfect. Enjoy every last bite!
Red Velvet Cheesecake Cupcakes
Equipment
- Cupcake pan
- Paper liners
- Medium bowl
- Larger bowl
- hand mixer
- stand mixer
- Aluminum foil
- airtight container
Ingredients
Ingredients
- ¾ cup of all-purpose flour
- 1 ½ tablespoons of unsweetened cocoa powder
- ½ teaspoon of baking soda
- ¼ teaspoon of salt
- 5 tablespoons of unsalted butter, softened
- ½ cup of granulated sugar
- 1 egg yolk
- 1 tablespoon of milk
- 1 teaspoon of vanilla extract (for crust)
- Red food coloring
- 12 ounces of full-fat cream cheese, softened
- 2 tablespoons of sour cream
- 5 tablespoons of sugar (for topping)
- 1 egg white
- 1 ½ teaspoons of vanilla extract (for topping)
- 1 ½ to 2 cups whipped cream (for serving)
- Heart-shaped sprinkles (for serving)
Instructions
Instructions
- Preheat your oven to 350°F and line a standard cupcake pan with paper liners.
- In a medium bowl, whisk together the flour, cocoa powder, baking soda, and salt. Set this aside.
- In a separate, larger bowl, use a hand mixer or stand mixer to beat the softened butter and sugar together until light and fluffy.
- Scrape down the sides of the bowl, then beat in the egg yolk, milk, and vanilla extract.
- Add a few drops of red food coloring until you achieve your desired shade of red.
- Gently mix the dry ingredients into the wet ingredients on low speed until just combined.
- Spoon about one tablespoon of the red velvet mixture into the bottom of each cupcake liner, pressing it down into an even layer.
- Pop the pan into the oven to pre-bake the crust for 6-7 minutes.
- While the crusts are baking, in a clean bowl, beat the softened cream cheese on medium-high speed until it’s completely smooth.
- Add the sour cream and sugar, mixing until they are just combined.
- Add the egg white and vanilla, and mix on medium speed only until the batter is smooth (do not overbeat).
- Spoon 2-3 tablespoons of the cheesecake mixture on top of each pre-baked red velvet crust, spreading it gently to the edges.
- Bake for another 18-20 minutes. The edges should be set, but the center should still have a slight jiggle. Loosely tent the pan with aluminum foil during the last 5-10 minutes of baking to prevent browning.
- Let the cupcakes cool at room temperature for about 30 minutes before transferring them to the refrigerator to set completely, which takes 1-2 hours.
- Before serving, top with a generous dollop of whipped cream and a smattering of sprinkles.