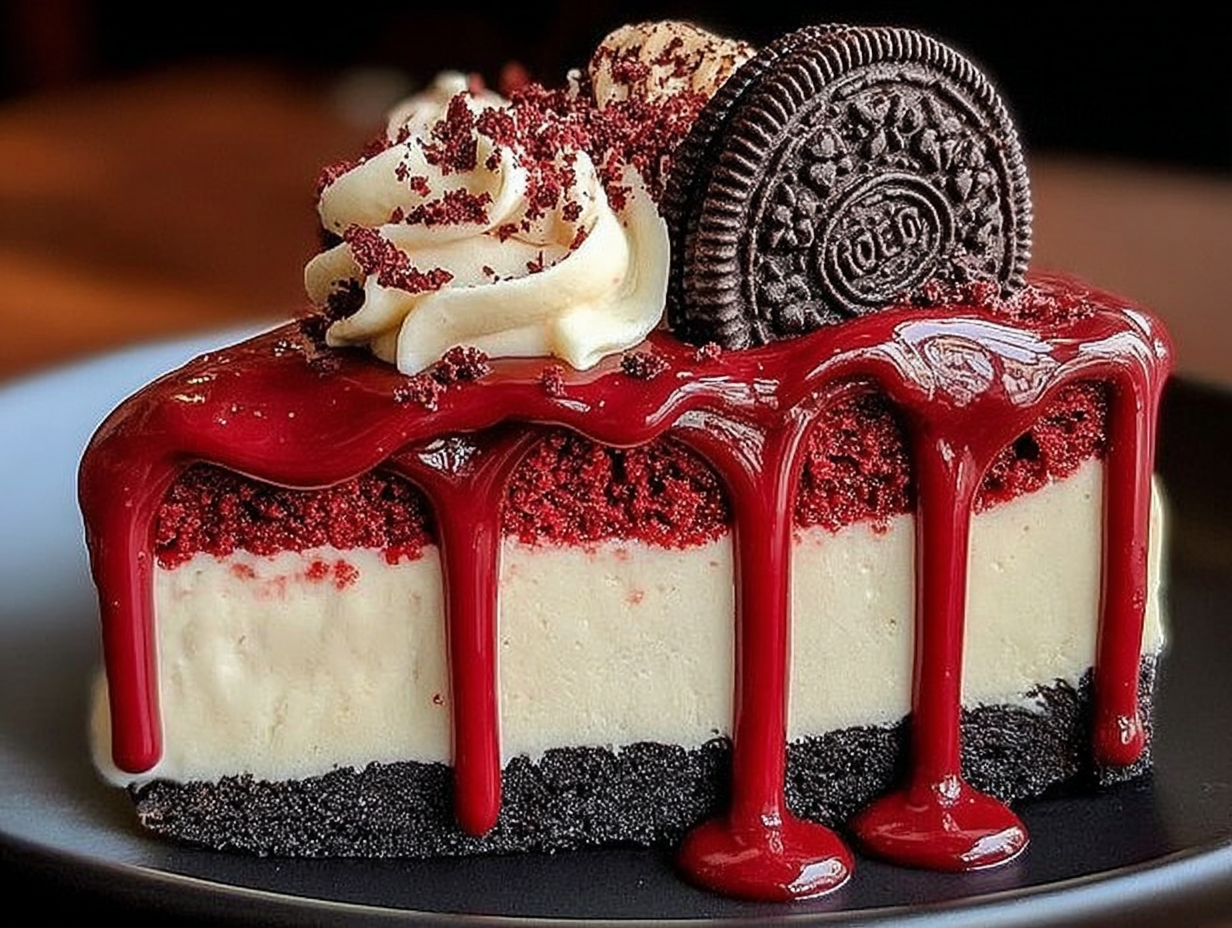
There are some desserts that are just… different. They’re more than just a sweet treat at the end of a meal; they’re an event. For me, this Red Velvet Oreo Cheesecake is that dessert. I first made it for a friend’s birthday, wanting to combine her two favorite things: red velvet cake and cheesecake. I wasn’t sure if the combination would work, but the result was pure magic. It’s a layered masterpiece of textures and flavors—a crunchy Oreo crust, a moist and tangy red velvet cake layer, and a rich, creamy cheesecake topping. It has since become my go-to for any special occasion, especially as a Valentine’s Day cheesecake idea, because it looks and tastes like pure love.
This isn’t just a cake and cheesecake slapped together; it’s a carefully balanced creation where each layer complements the others. The slight tang of the red velvet cuts through the richness of the cheesecake, and the deep chocolate flavor of the Oreo crust grounds everything. It’s the kind of show-stopping, bakery-style dessert that will have everyone asking for the recipe. So, let’s get into it!
The Anatomy of a Perfect Red Velvet Oreo Cheesecake
The magic of this dessert is in its layers, and each one requires just the right ingredients to shine. This isn’t the time for shortcuts! Here’s what you’ll need and why it matters.
For the Oreo Cookie Crust
- Oreo Crumbs: You’ll need about two cups, which is roughly 20-25 cookies. I find it easiest to blitz them in a food processor until they’re very fine, but a sealed bag and a rolling pin work just as well for a more rustic texture.
- Unsalted Butter: A quarter cup of melted butter is the glue that holds our crust together. Unsalted is key here to control the saltiness of the final product.
For the Red Velvet Cake Layer
- The Dry Goods: A simple mix of 1 1/4 cups all-purpose flour, 1/4 cup unsweetened cocoa powder (not Dutch-processed!), 1/2 teaspoon baking powder, 1/4 teaspoon baking soda, and 1/4 teaspoon of salt. This combination gives the cake its structure and classic, mild chocolate flavor.
- The Fats & Sugars: 1/2 cup of softened, unsalted butter and 1 cup of granulated sugar. Creaming these together gives the cake its light, tender crumb.
- The Binders & Liquids: Two large, room-temperature eggs are essential for structure. For that signature red velvet tang, you’ll need 1/2 cup of buttermilk, 1 teaspoon of white vinegar, and 1 teaspoon of pure vanilla extract.
- The Color: About 1 tablespoon of red food coloring gives this cake its famous vibrant hue. I prefer using a gel food coloring for a more intense color without adding extra liquid.
For the Cheesecake Layer
- Cream Cheese: The star of the show! You’ll need 16 ounces (two full packages) of full-fat, block-style cream cheese. Do not use the kind in a tub! It must be softened to room temperature to avoid lumps.
- Sugar & Eggs: 1/2 cup of granulated sugar for sweetness and two large, room-temperature eggs to set the filling.
- The Creamy Finish: 1/4 cup of sour cream and 1 teaspoon of vanilla extract add a final touch of tangy flavor and an incredibly smooth, creamy texture.
Bringing the Masterpiece to Life, Step by Step
This recipe involves a few distinct steps, but don’t be intimidated. Take your time with each layer, and you’ll be rewarded with a stunning dessert. I recommend using a 9-inch springform pan for easy removal.
Step 1: Create the Oreo Crust
First, preheat your oven to 350°F (175°C). In a small bowl, mix your finely crushed Oreo crumbs with the melted unsalted butter until it looks like damp sand. Tip the mixture into your 9-inch springform pan and press it down firmly and evenly across the bottom. I use the flat bottom of a measuring cup to get it nice and compact. Bake this for about 8-10 minutes just to set it. Once it’s done, place the pan on a wire rack to cool completely while you work on the next layer.
Step 2: Bake the Red Velvet Cake Layer
In a medium bowl, whisk together your flour, cocoa powder, baking powder, baking soda, and salt. Set that aside. In a larger bowl, using an electric mixer, cream the softened butter and 1 cup of granulated sugar until the mixture is light and fluffy, about 2-3 minutes. Beat in the eggs one at a time, followed by the buttermilk, vanilla, vinegar, and red food coloring. Mix until everything is smooth and vividly red. Now, gradually add the dry ingredients to the wet ingredients, mixing on low speed until they are just combined. Do not overmix the batter! Overmixing develops gluten and will make your cake tough.
Pour this beautiful red batter into a separate, greased and floured 9-inch round cake pan. Bake for 25-30 minutes, or until a toothpick inserted into the center comes out clean. Let the cake cool in the pan for about 15 minutes before turning it out onto a wire rack to cool completely. Once it’s fully cooled, you might need to level the top with a serrated knife to ensure a flat surface for our cheesecake layer. Reserve a few of these crumbs for garnish!
Step 3: Whip Up the Cheesecake Filling & Assemble
Reduce the oven temperature to 325°F (160°C). In a large bowl, beat the room-temperature cream cheese with an electric mixer until it’s completely smooth and free of lumps. Add the 1/2 cup of sugar and continue to beat until creamy. Add the eggs one at a time, mixing on low speed after each addition just until the yolk disappears. Finally, mix in the sour cream and vanilla. The key here is to mix on low speed and avoid incorporating too much air, which can cause cracks later.
Now for the assembly! Carefully place your cooled red velvet cake layer on top of the Oreo crust inside the springform pan. Pour the cheesecake batter evenly over the red velvet cake. Smooth the top with a spatula. It’s ready for the oven!
My Secrets to a Flawless, Crack-Free Finish
Cheesecakes can be a bit fussy, but these tips will help you get a perfect result every time. The most important secret is using a water bath, or bain-marie. This method creates a steamy, humid environment in the oven, which allows the cheesecake to bake gently and evenly, preventing cracks.
- The Water Bath: Before you put the cake in the oven, wrap the outside of your springform pan with a few layers of heavy-duty aluminum foil. This will prevent any water from seeping in. Place the wrapped pan in a larger roasting pan and fill the roasting pan with about an inch of hot water.
- Bake and Cool Slowly: Bake at 325°F (160°C) for 50-60 minutes. The edges should be set, but the center should still have a slight wobble. Turn off the oven, crack the door open, and let the cheesecake cool inside the oven for at least an hour. This gradual temperature change is another key to preventing cracks.
- Chill Thoroughly: After cooling in the oven, remove the cheesecake from the water bath and let it cool on the counter. Once it’s at room temperature, cover it with plastic wrap and refrigerate for at least 6 hours, but preferably overnight. This chilling time is non-negotiable—it allows the cheesecake to set completely.
Chef’s Secret: White Chocolate Ganache Drizzle
For an extra touch of decadence and one of my favorite red velvet cake topping ideas, I love to add a white chocolate ganache. Simply heat 1/4 cup of heavy cream until it’s just simmering, then pour it over 1/2 cup of white chocolate chips in a bowl. Let it sit for 5 minutes, then stir until smooth. Let it cool slightly before drizzling it over the chilled cheesecake. It adds a beautiful visual contrast and a sweet, creamy flavor that perfectly complements the red velvet and Oreo.
How to Store Your Cheesecake Creation
Once you’ve served this beauty, you’ll want to store any leftovers properly to keep them tasting fresh. The cheesecake should be stored in the refrigerator. You can either keep it in the springform pan covered tightly with plastic wrap or transfer slices to an airtight container. It will stay fresh and delicious for up to 5 days.
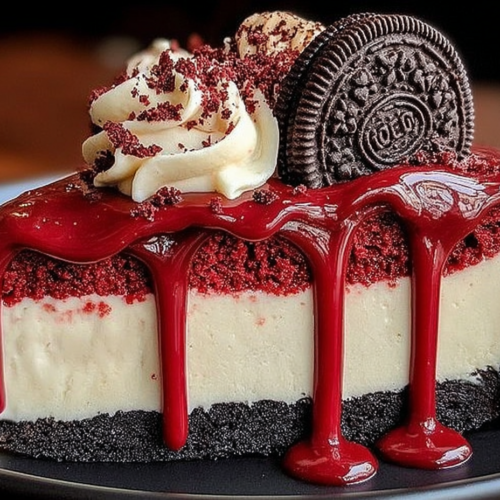
When you’re ready to serve, decorate with whipped cream, the reserved red velvet cake crumbs, and some crushed or halved Oreos. Enjoy every single bite of this trending dessert recipe—you’ve earned it!
Red Velvet Oreo Cheesecake
Equipment
- Food processor
- Electric mixer
- Springform pan
- 9-inch round cake pan
- Wire rack
- Serrated knife
- Roasting pan
- spatula
Ingredients
Ingredients
- 2 cups Oreo Crumbs (roughly 20-25 cookies)
- 1/4 cup unsalted butter, melted
- 1 1/4 cups all-purpose flour
- 1/4 cup unsweetened cocoa powder (not Dutch-processed!)
- 1/2 teaspoon baking powder
- 1/4 teaspoon baking soda
- 1/4 teaspoon salt
- 1/2 cup softened, unsalted butter
- 1 cup granulated sugar
- 2 large, room-temperature eggs
- 1/2 cup buttermilk
- 1 teaspoon white vinegar
- 1 teaspoon pure vanilla extract
- 1 tablespoon red food coloring (gel preferred)
- 16 ounces (two full packages) full-fat, block-style cream cheese, softened to room temperature
- 1/2 cup granulated sugar
- 2 large, room-temperature eggs
- 1/4 cup sour cream
- 1 teaspoon vanilla extract
- 1/4 cup heavy cream (for optional ganache)
- 1/2 cup white chocolate chips (for optional ganache)
- Whipped cream (for garnish)
- Reserved red velvet cake crumbs (for garnish)
- Crushed or halved Oreos (for garnish)
Instructions
Instructions
- Preheat oven to 350°F (175°C). In a small bowl, mix 2 cups finely crushed Oreo crumbs with 1/4 cup melted unsalted butter until it resembles damp sand.
- Press the Oreo mixture firmly and evenly into the bottom of a 9-inch springform pan. Bake for 8-10 minutes to set, then place on a wire rack to cool completely.
- In a medium bowl, whisk together 1 1/4 cups all-purpose flour, 1/4 cup unsweetened cocoa powder, 1/2 teaspoon baking powder, 1/4 teaspoon baking soda, and 1/4 teaspoon salt. Set aside.
- In a larger bowl, using an electric mixer, cream 1/2 cup softened unsalted butter and 1 cup granulated sugar until light and fluffy (2-3 minutes).
- Beat in 2 large eggs one at a time, followed by 1/2 cup buttermilk, 1 teaspoon white vinegar, 1 teaspoon pure vanilla extract, and 1 tablespoon red food coloring. Mix until smooth and vividly red.
- Gradually add the dry ingredients to the wet ingredients, mixing on low speed until just combined. Do not overmix.
- Pour the red velvet batter into a separate, greased and floured 9-inch round cake pan. Bake for 25-30 minutes, or until a toothpick inserted into the center comes out clean.
- Let the cake cool in the pan for about 15 minutes, then turn it out onto a wire rack to cool completely. Level the top with a serrated knife if needed and reserve a few crumbs for garnish.
- Reduce oven temperature to 325°F (160°C). In a large bowl, beat 16 ounces room-temperature full-fat cream cheese with an electric mixer until completely smooth and lump-free.
- Add 1/2 cup granulated sugar and continue to beat until creamy. Add 2 large eggs one at a time, mixing on low speed after each addition until the yolk disappears.
- Finally, mix in 1/4 cup sour cream and 1 teaspoon vanilla extract on low speed, avoiding incorporating too much air.
- Carefully place the cooled red velvet cake layer on top of the Oreo crust inside the springform pan. Pour the cheesecake batter evenly over the red velvet cake and smooth the top with a spatula.
- Prepare a water bath: Wrap the outside of the springform pan with a few layers of heavy-duty aluminum foil. Place the wrapped pan in a larger roasting pan and fill the roasting pan with about an inch of hot water.
- Place the roasting pan with the cheesecake into the preheated oven. Bake at 325°F (160°C) for 50-60 minutes, until the edges are set but the center still has a slight wobble.
- Turn off the oven, crack the door open, and let the cheesecake cool inside the oven for at least an hour.
- After cooling in the oven, remove the cheesecake from the water bath and let it cool on the counter to room temperature.
- Cover the cheesecake with plastic wrap and refrigerate for at least 6 hours, but preferably overnight, to allow it to set completely.
- For an optional white chocolate ganache drizzle: Heat 1/4 cup heavy cream until just simmering. Pour it over 1/2 cup white chocolate chips in a bowl. Let sit for 5 minutes, then stir until smooth. Let cool slightly before drizzling over the chilled cheesecake.
- To serve, decorate with whipped cream, the reserved red velvet cake crumbs, and some crushed or halved Oreos.
- Store any leftovers in the refrigerator, either in the springform pan covered tightly with plastic wrap or in an airtight container, for up to 5 days.